Client Profile: Appointments
Creating and managing client profile appointments is easily accessible within the client profile screen.
In this Article:
- Appointments List / Overview
- Create New Appointment
- Cancel Future Appointments
- Print Upcoming List of Appointments
Appointments - Overview

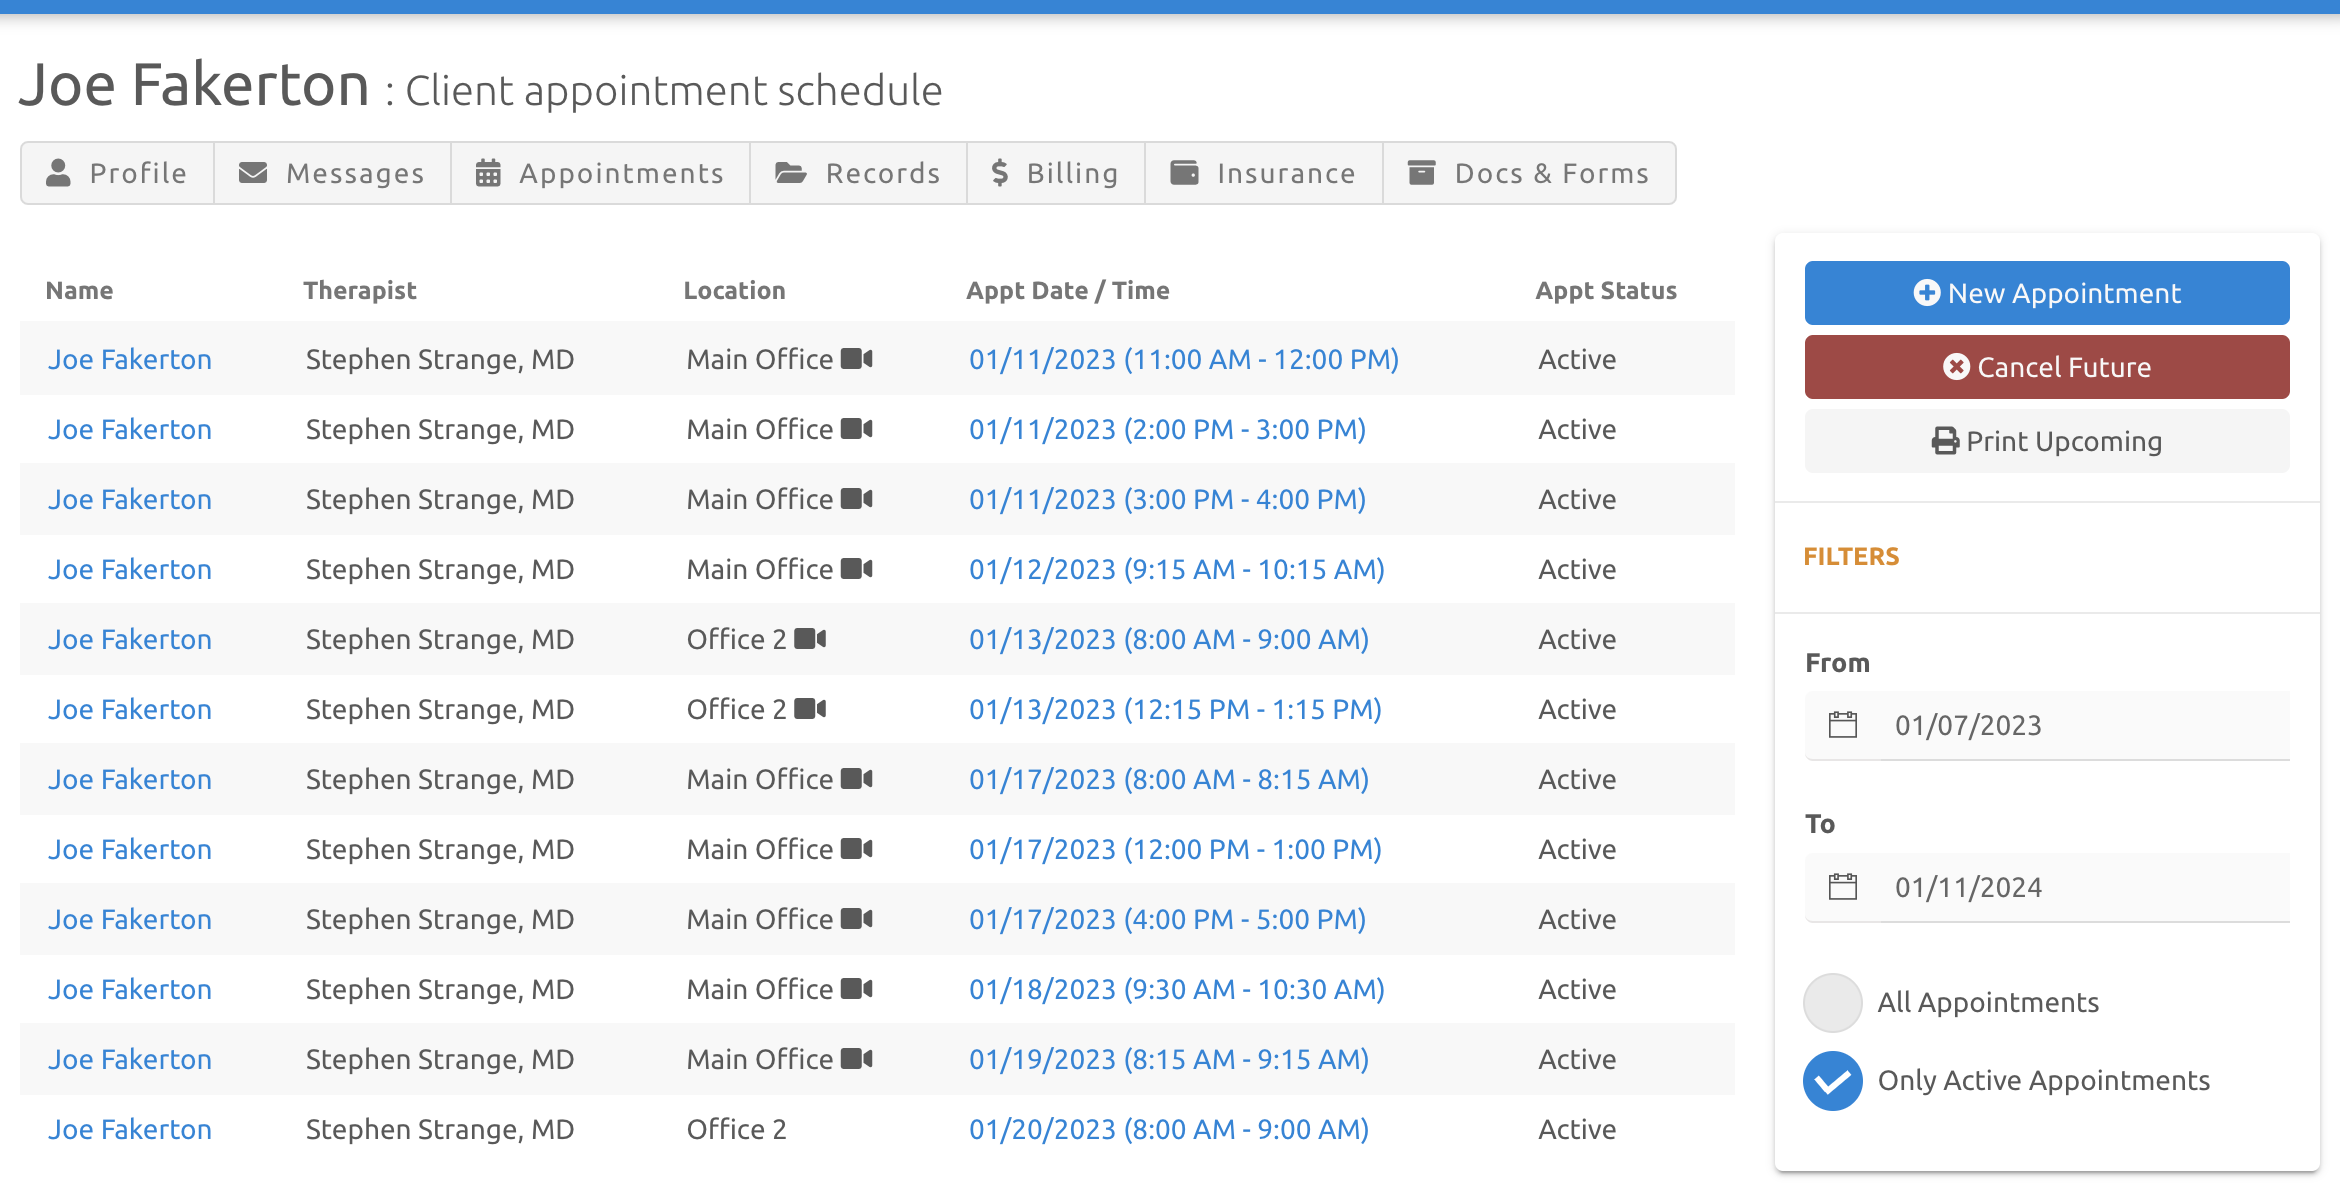
From here we display a list of appointments within the filter date range. You can additionally filter by all or only active appointments.
From the far right menu you can additionally:
- Add a new appointment
- Cancel all future appointments
- and print an upcoming list of appointments
All options are discussed below:
Create an Appointment
While creating an appointment directly from your Schedule (or Find Availability) is the easiest way in day-to-day work, you can still schedule directly from a client's profile!
This may be helpful if you want to see an overview of the client's appointments.
From the Appointments tab, click the far right blue button:

You'll then be brought to the next screen, our Find Availability tool (article: Find Availability)

Not seeing availability?
If you don't have availability defined, you'll certainly want to do so as a provider!
Click the button at the top right to easily create/draw your availability calendar first, then come back to this screen.
Article: Edit Availability
Click on the time slot that works for your appointment, which will bring up a confirmation dialogue box like below:

Check off Telehealth Session if you wish to designate it as a telehealth session, then click button to create the client appointment on your schedule.
Cancel Future Appointments
To do this, click the red button to cancel all the client's upcoming, future appointments.
Print Upcoming
This will display a PDF (that you can print or save) with all the client's upcoming appointments.
If it's an in person appointment we display the location. Telehealth visits are also noted:
Example:
