Group Therapy Sessions: Creating, Scheduling, Charting, Payments
Looking to create and chart on group sessions?
Within the Article:
Create a Client Group
To add a new group, follow these steps:
- Click Clients (left menu)
- Click the button:

- If you have multiple providers, pick the provider for this group
- Enter the full group name, initials, and the CPT code typically used:
- Click
Video:

Add Clients to a Group
From the Group List
- Within Clients (left menu), the new group will now show near the top of the list
- Click on the group to load the group details:

- Click to the right of Add Client, type their name, then click the dropdown to add them to the group
- To remove a client from a group, to the right of their name click
- To edit the group name or default CPT code used, click
- When finished, click
From the Client Profile
Alternatively, from a client's profile, you can add a particular client to a group, or manage their existing group membership.
Go to:
- Clients (left menu)
- Click on the client's name, loading their Profile
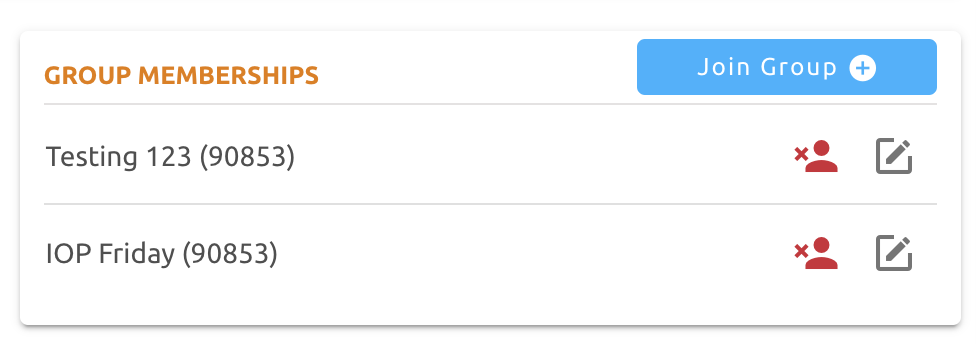
- Find the section Group Membership
- At the top right corner, click and click the group name

⚠️ Note: Here we also list other groups the client is a part of:
- To Remove the client from this group, click the far right red profile icon
- To Edit that particular group, click the far right grey square with a pencil icon
Group Scheduling
Once the new group has been created and clients added, it is time to get them on the schedule!
Do this as you would a client, via the schedule.
- Click Schedule (left menu)
- Click on the date & time you wish to create the group for
- Type part of the group's name in and click on it
- Click
Once on the schedule, click on the appointment to manage attendance, payment, and charting.
Attendance
The main breakdown in attendance is yes or no:
- With yes, you can use a:
- Standard, or custom CPT code
- Even no fee
- With no, you can use one of the available system codes (no show, late cancel, or no fee)
If you have more attending than not, the easiest thing is to mark them all as attended shown below:
Not to worry, you can still edit specific client CPT codes later

If attendance is not set, to select a CPT code click on the dropdown under the Attendance column.
With the dropdown we group & list the attendance order from Yes → No. Scroll down to find your selection:

If attendance is already set, click the pencil icon to first clear out the selection, then click the dropdown:

We also support multiple different CPT code selections!

To the left of the CPT code (when selected), we denote the yes/no attendance with green/red icons:

Video outlining the attendance process:

Accept Payment
To the right of the CPT code for any client, click to take a payment for this session.
Start Charting
To begin charting, click the top far right button:

- If looking to use a custom chart note template, select it from the Chart Entry Style dropdown:
- Only custom templates are supported
- Our HIPAA and SOAP note templates are only available on single client appointments
- Custom templates can't be edited, but you can include more details in the Group Notes section

- For general group session notes, enter those in the Group Notes section (supports rich text)
- These will become a part of all client chart notes that attended the session
- For any specific client notes, enter them below, to the right of each client's respective name:

- When complete, click the bottom right button
- Review the chart note, ensuring it's correct and click the bottom right button